
Triumph: Photographing Motorcycles in Action
How to shoot motorcycles in action:
As a professional photographer personal work plays a big part in my business. Not only does it keep my portfolio fresh and evolving in between paying gigs, but it can in fact lead to those paying gigs both directly and indirectly. It allows me to ‘play’ with new techniques and get images out of my mind and out to the world.
I’ve been wanting to do some automotive style work for a while. Specifically in-motion driving images. There are several ways to go about achieving the look of the photographs below. The absolute proper and best way to shoot this kind of work is with a professional automotive rig. The rig itself (an arm like appendage) attaches to the vehicle being photographed and the camera is in turn attached to the end of the rig. What this allows for is syncing of the movement of the car/motorcycle/dune buggy with the camera. The vehicle is then moved very very slowly and a long shutter speed is used to mimic the sensation of movement. Since the camera is attached to the car itself the vehicle remains sharp as a tack and only the wheels that are spinning show the motion… the background scene and road surface move over the length of the exposure leading the viewer to see the car as driving much faster than it is in reality. It’s a camera trick. As a side note… in the last few years computer technology has changed automotive photography in some cases. A software exists called Virtual Rig. With this software the photographer can shoot what we call background plates (basically empty scenes of scenic roadways etc) and then move the vehicle into place and shoot that in the scene. Virtual Rig then allows for that background plate to be manipulated with motion tools to achieve the proper and believable amount of motion that would exist. The vehicle is then photoshopped into the final scene.
There are a few problems that arise with the above two techniques of photographing vehicles. A physical automotive rig is expensive to rent along with it’s operators, it requires having to shut down the portion of any public roadway you may be shooting in, and it doesn’t work well with motorcycles. Virtual Rig, while a very good second option, is also an expensive piece of software and creating believable results takes a great amount of skill and experience with it… it also involves the most amount of post-processing time.
So what’s a good option for shooting motorcycles in motion?… a hitch mounted camera rig. This is how I achieved the results of the images below. First, you’re going to need some way to attach the camera to the rear bumper of your car. Having a hitch installed on your vehicle is almost a must for this method. Next, you’re going to need some sort of rigging equipment to attach a tripod head to your hitch… you don’t want to mess around with this set up and risk having your camera go down in the road so think this through and once you’ve come up with something test it and test it again. Here’s what I used.

Camera Hitch Mount
Mounting a camera to your car for action shots:
Okay… so what do we have here? First I already had a hitch on my car. I then used a Manfrotto Super Clamp with a solid brass stud to attach the tripod head to the hitch receiver… (if you do this don’t forget to put the hitch pin in… I used a locking pin). The Super Clamp is just what it sounds like. It is vice like and will hold anything to pretty much anything… every photographer should have a couple of Super Clamps. The solid brass stud is what is coming out of the top of the clamp in the photo. It’s reversible with threads on either end… 1/4 inch and 3/8ths inch. There are cheap studs available, but I’ve had them break before and don’t recommend them… make sure it’s solid brass. It inserts into the Super Clamp and has both a locking pin and a hand tightener… tighten both of those knobs you see down as much as you can. Most every tripod head ever made has a 3/8ths inch socket on the bottom… attach this to the brass stud and tighten it down as much as you can. I also recommend if you’re going to try this to use a high quality tripod head.
At this point you now have a camera hitch rig. You’re going to want to really test this thing out to make sure there’s no slippage and that it’s incredibly solid. I also highly advise coming up with some sort of fail safe. If you notice in the photo I have my camera strap closed in the hatch door. Not only is it closed in the door, but the latch of the door is through the strap. If anything crazy happens this will at least keep the camera from totally going down and being destroyed on the road. I’m sure there are even better ways to do this, but I felt completely confident in this method. A tip here before we move on… most hitches and their receivers have a little bit of play in between them which is fine for towing a boat or trailer, but not ideal for having a camera attached. You’ll see a little bright spot in the above photo where the receiver meets the hitch. I used simple wooden shims from the hardware store to jam into the spaces so that there was no play within the hitch and receiver.
Now that we’ve got our hitch rig set up and tested thoroughly it’s time to attach the camera to the tripod head. Be sure the plate on the camera is tightened down and go ahead and attach the camera system. You can now adjust the tripod head to point the camera wherever you want. I aimed mine dead level and straight back from the car. At this point you need to collaborate with the operator of the vehicle you’re shooting to determine how far from your rear bumper you need them to try to stay at. Go ahead and while parked move the car/motorcycle/dune buggy into the ideal position. Pre focus and then switch off any autofocus system… your focus at that given distance is now set… the driver will need to try to maintain that distance. Now go ahead and take a test shot to determine your best exposure settings. Be sure you’re shooting manual mode. When doing this think about the lighting you’re going to be driving and shooting in… will you be passing through a lot of shadows or will you be consistently in a strong light source? Think about what exposure is going to give you both foreground/vehicle detail as well as hold any sky detail that may exist.
So we’ve got the camera attached to the hitch rig and our exposure and focus are ready to go… now how are we going to trigger the shutter button without hanging off the back of the car? Tethering. Tethering is simply wiring your camera into your laptop via USB to communicate with different software. Lightroom allows you to tether as does Aperture and various other programs. I use Capture One Pro 8 and very highly recommend it to any type of photographer. It’s similar to Lightroom in its functions for RAW editing and tethering, but I prefer the way it handles my image files. It also, like Lightroom, allows you to both trigger a tethered camera system and control it’s ISO, shutter speed, and aperture. Any of these software options will work for what we are going to do… it all comes down to what you own and prefer for your personal workflow.
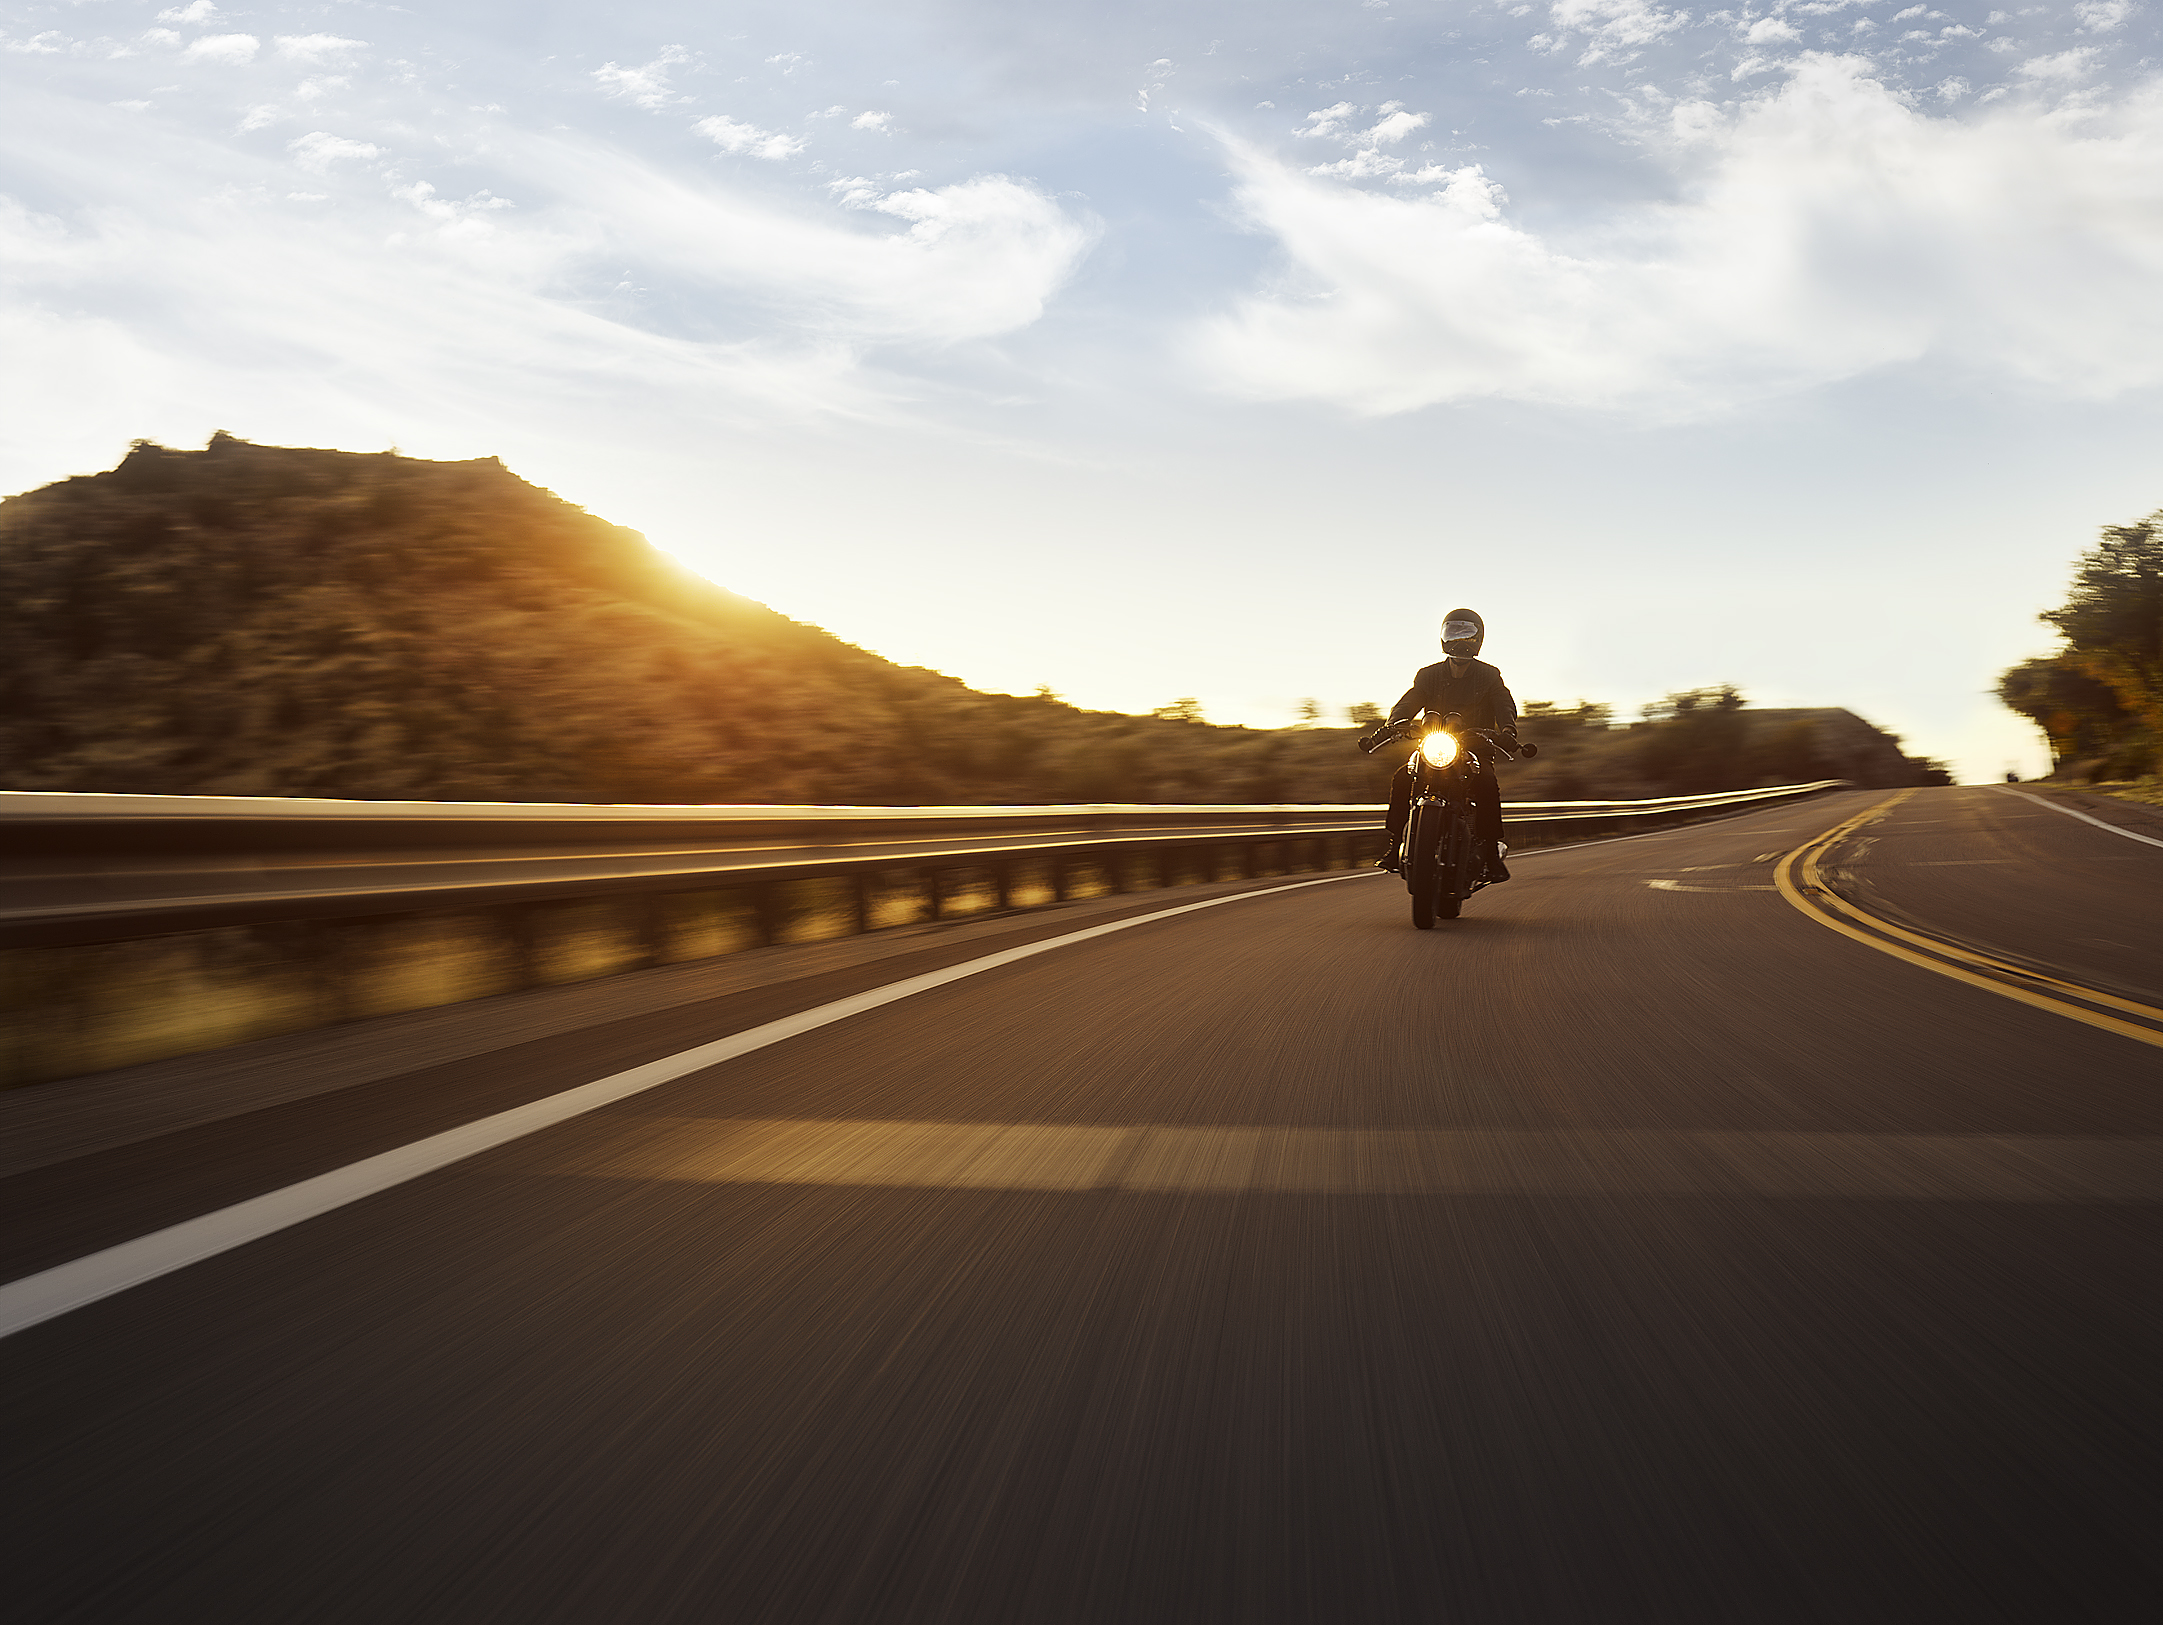
Everything’s set and we’re ready to roll. The vehicle operator fully understands the distance to camera relationship and you have a driver for your own ‘Camera Car’. First thing to consider… you don’t need to be going very fast for this. Going 50+ mph isn’t going to do much for your images and will in fact create problems. We kept our speed at a constant 30-35 mph. I used a deep depth of field (f/11-f/16) to not only help maintain focus, but to give us a longer shutter speed. 1/15th of a second is all you really need at this driving speed. I played around with longer exposure, but it just created problems with motion blur in the motorcycle. 1/15th was our sweet spot. Sitting in the backseat with the laptop I was able to shoot straight from the software and change exposure as necessary. Being tethered also means the images pop onto your screen as you shoot… this gave me the confidence that this whole fiasco was working and that we were getting the shots. Unlike having an automotive rig attached to the motorcycle there was some very very minor motion blur in the subject, but you just have to shoot a lot of frames so you end up with a nice selection to edit later. This hitch rig surprised all of us and we actually ended up with a lot more useable shots than I had anticipated. I was very pleased with the results.
Alternately, if you want to photograph motorcycles or cars from behind you can use all the above steps, but mount the camera to your hood or side panel using a Manfrotto Suction Grip.
Going back to what I was saying at the beginning… personal projects are a photographer’s way of not only getting images out of their minds and into the world, but a proving grounds for new techniques. It can be anything really. So think about that set of badass images you’ve had in the back of your mind but haven’t went out and attempted to produce for some reason… go test and challenge yourself… just go do it. A good photographer should have a curious soul.
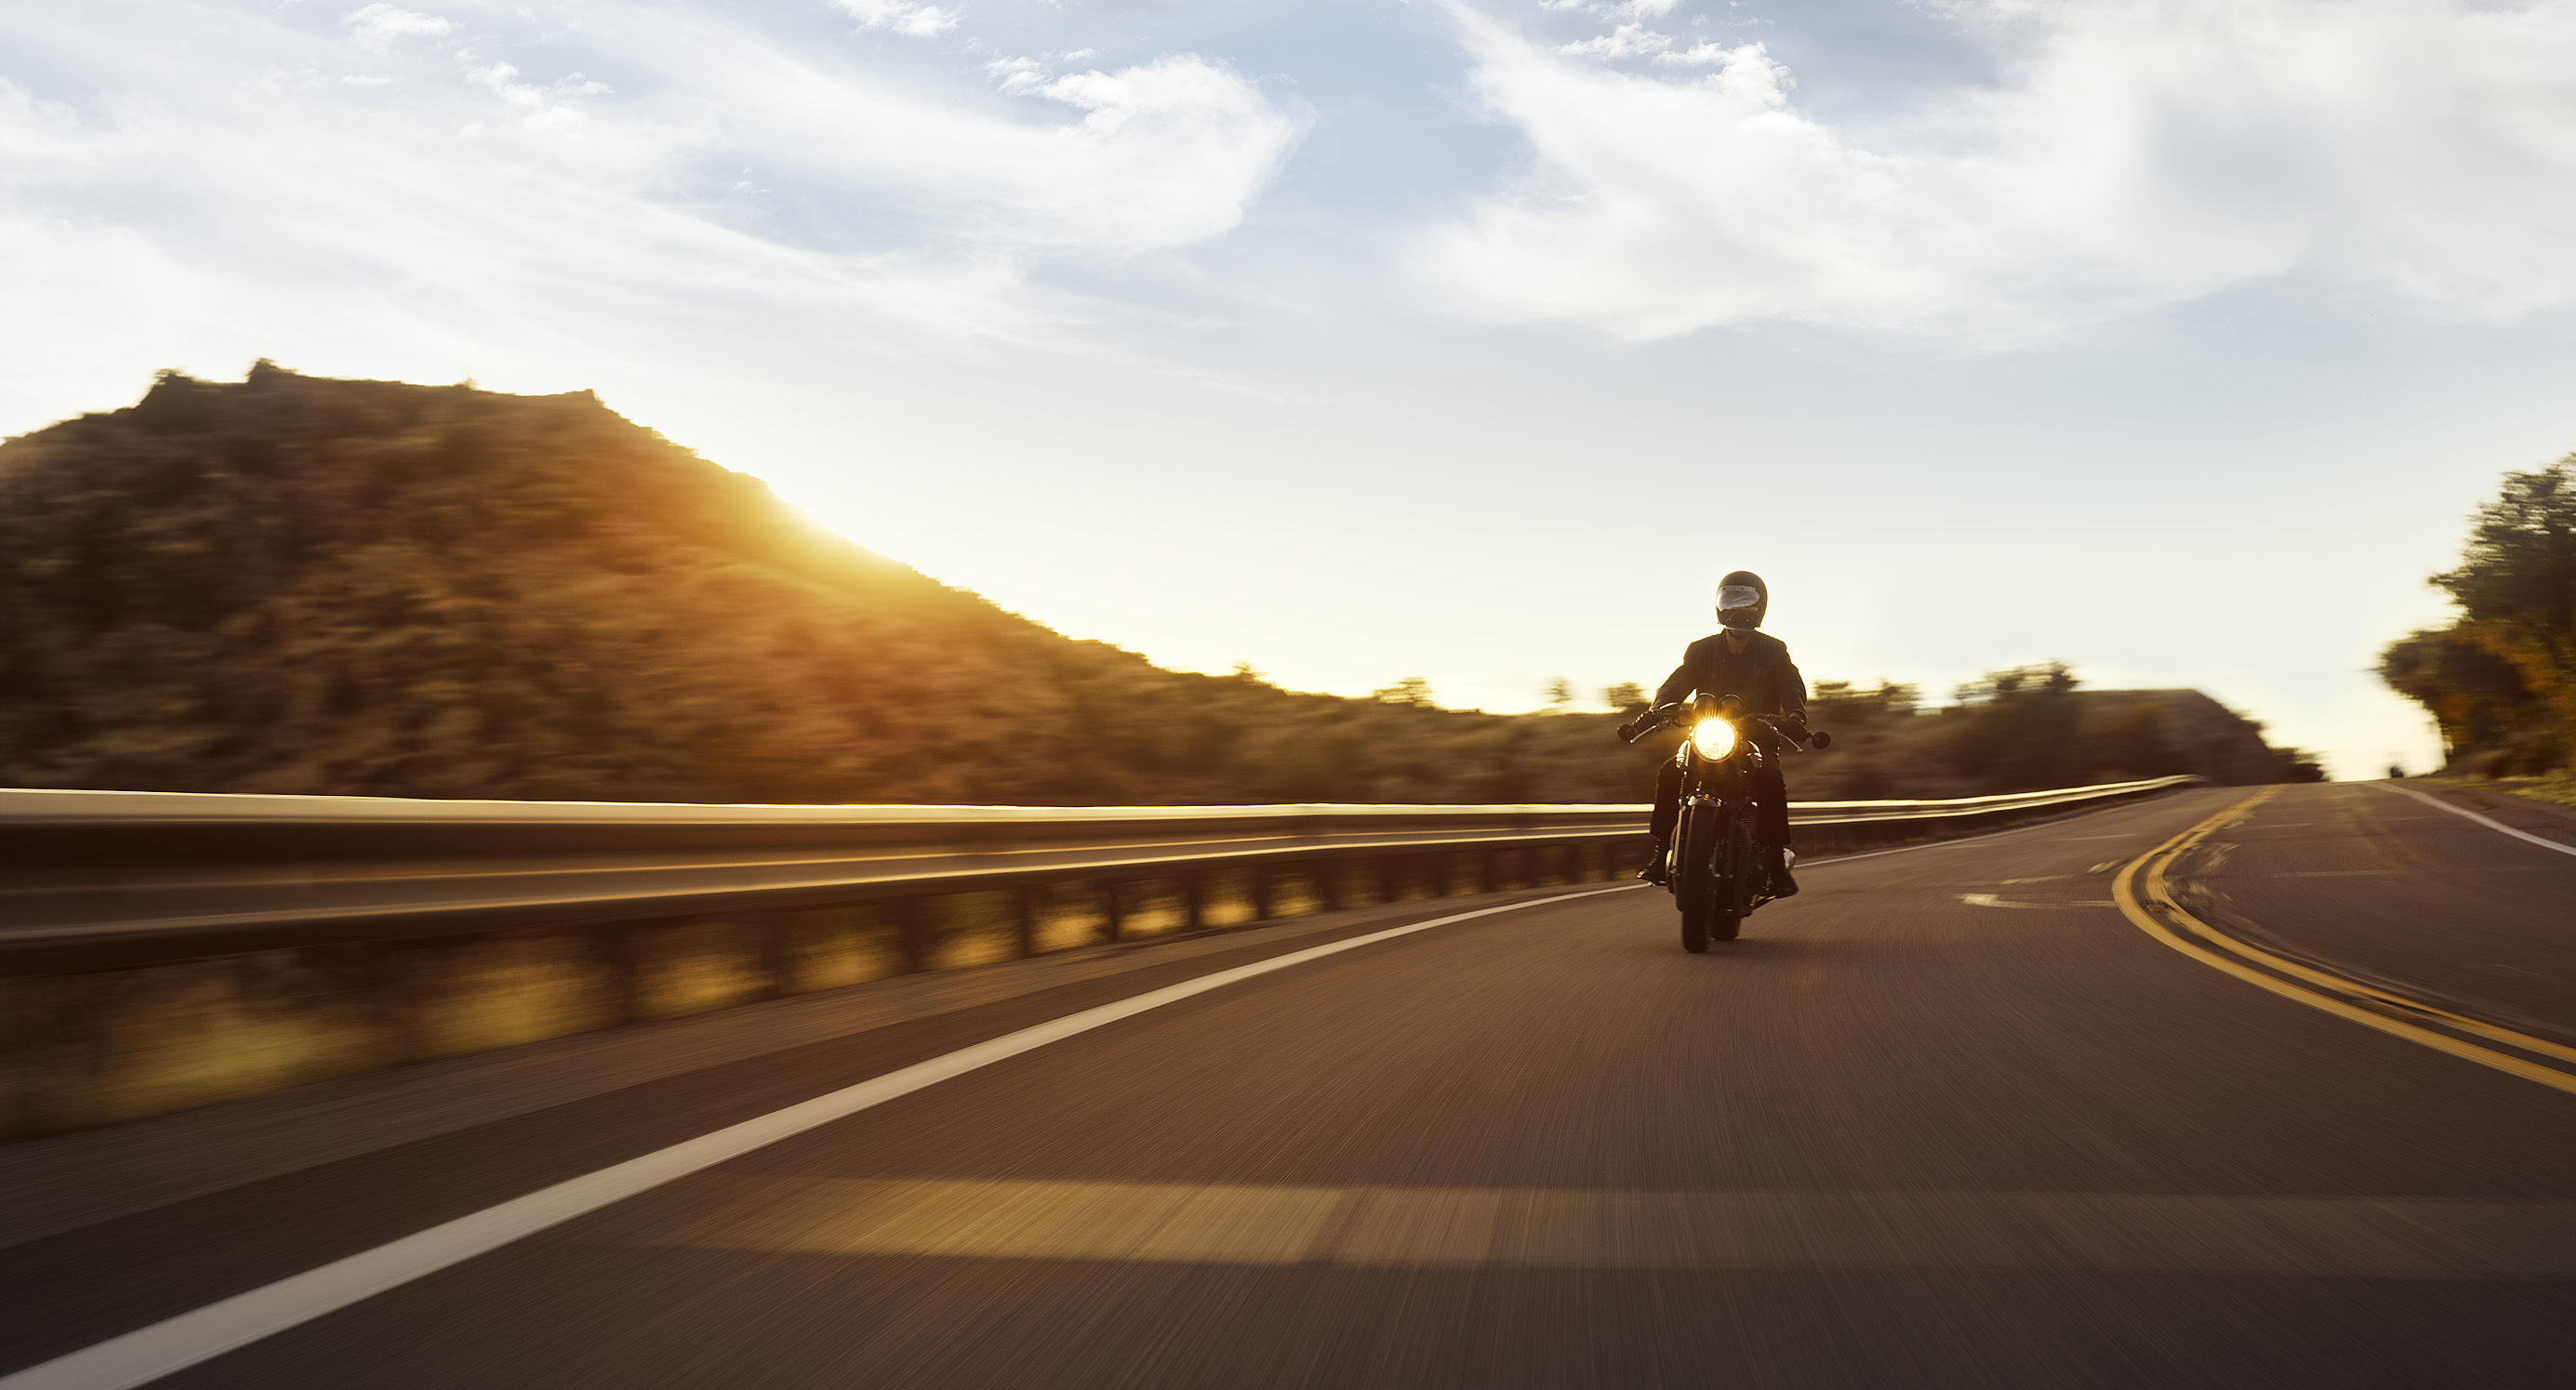
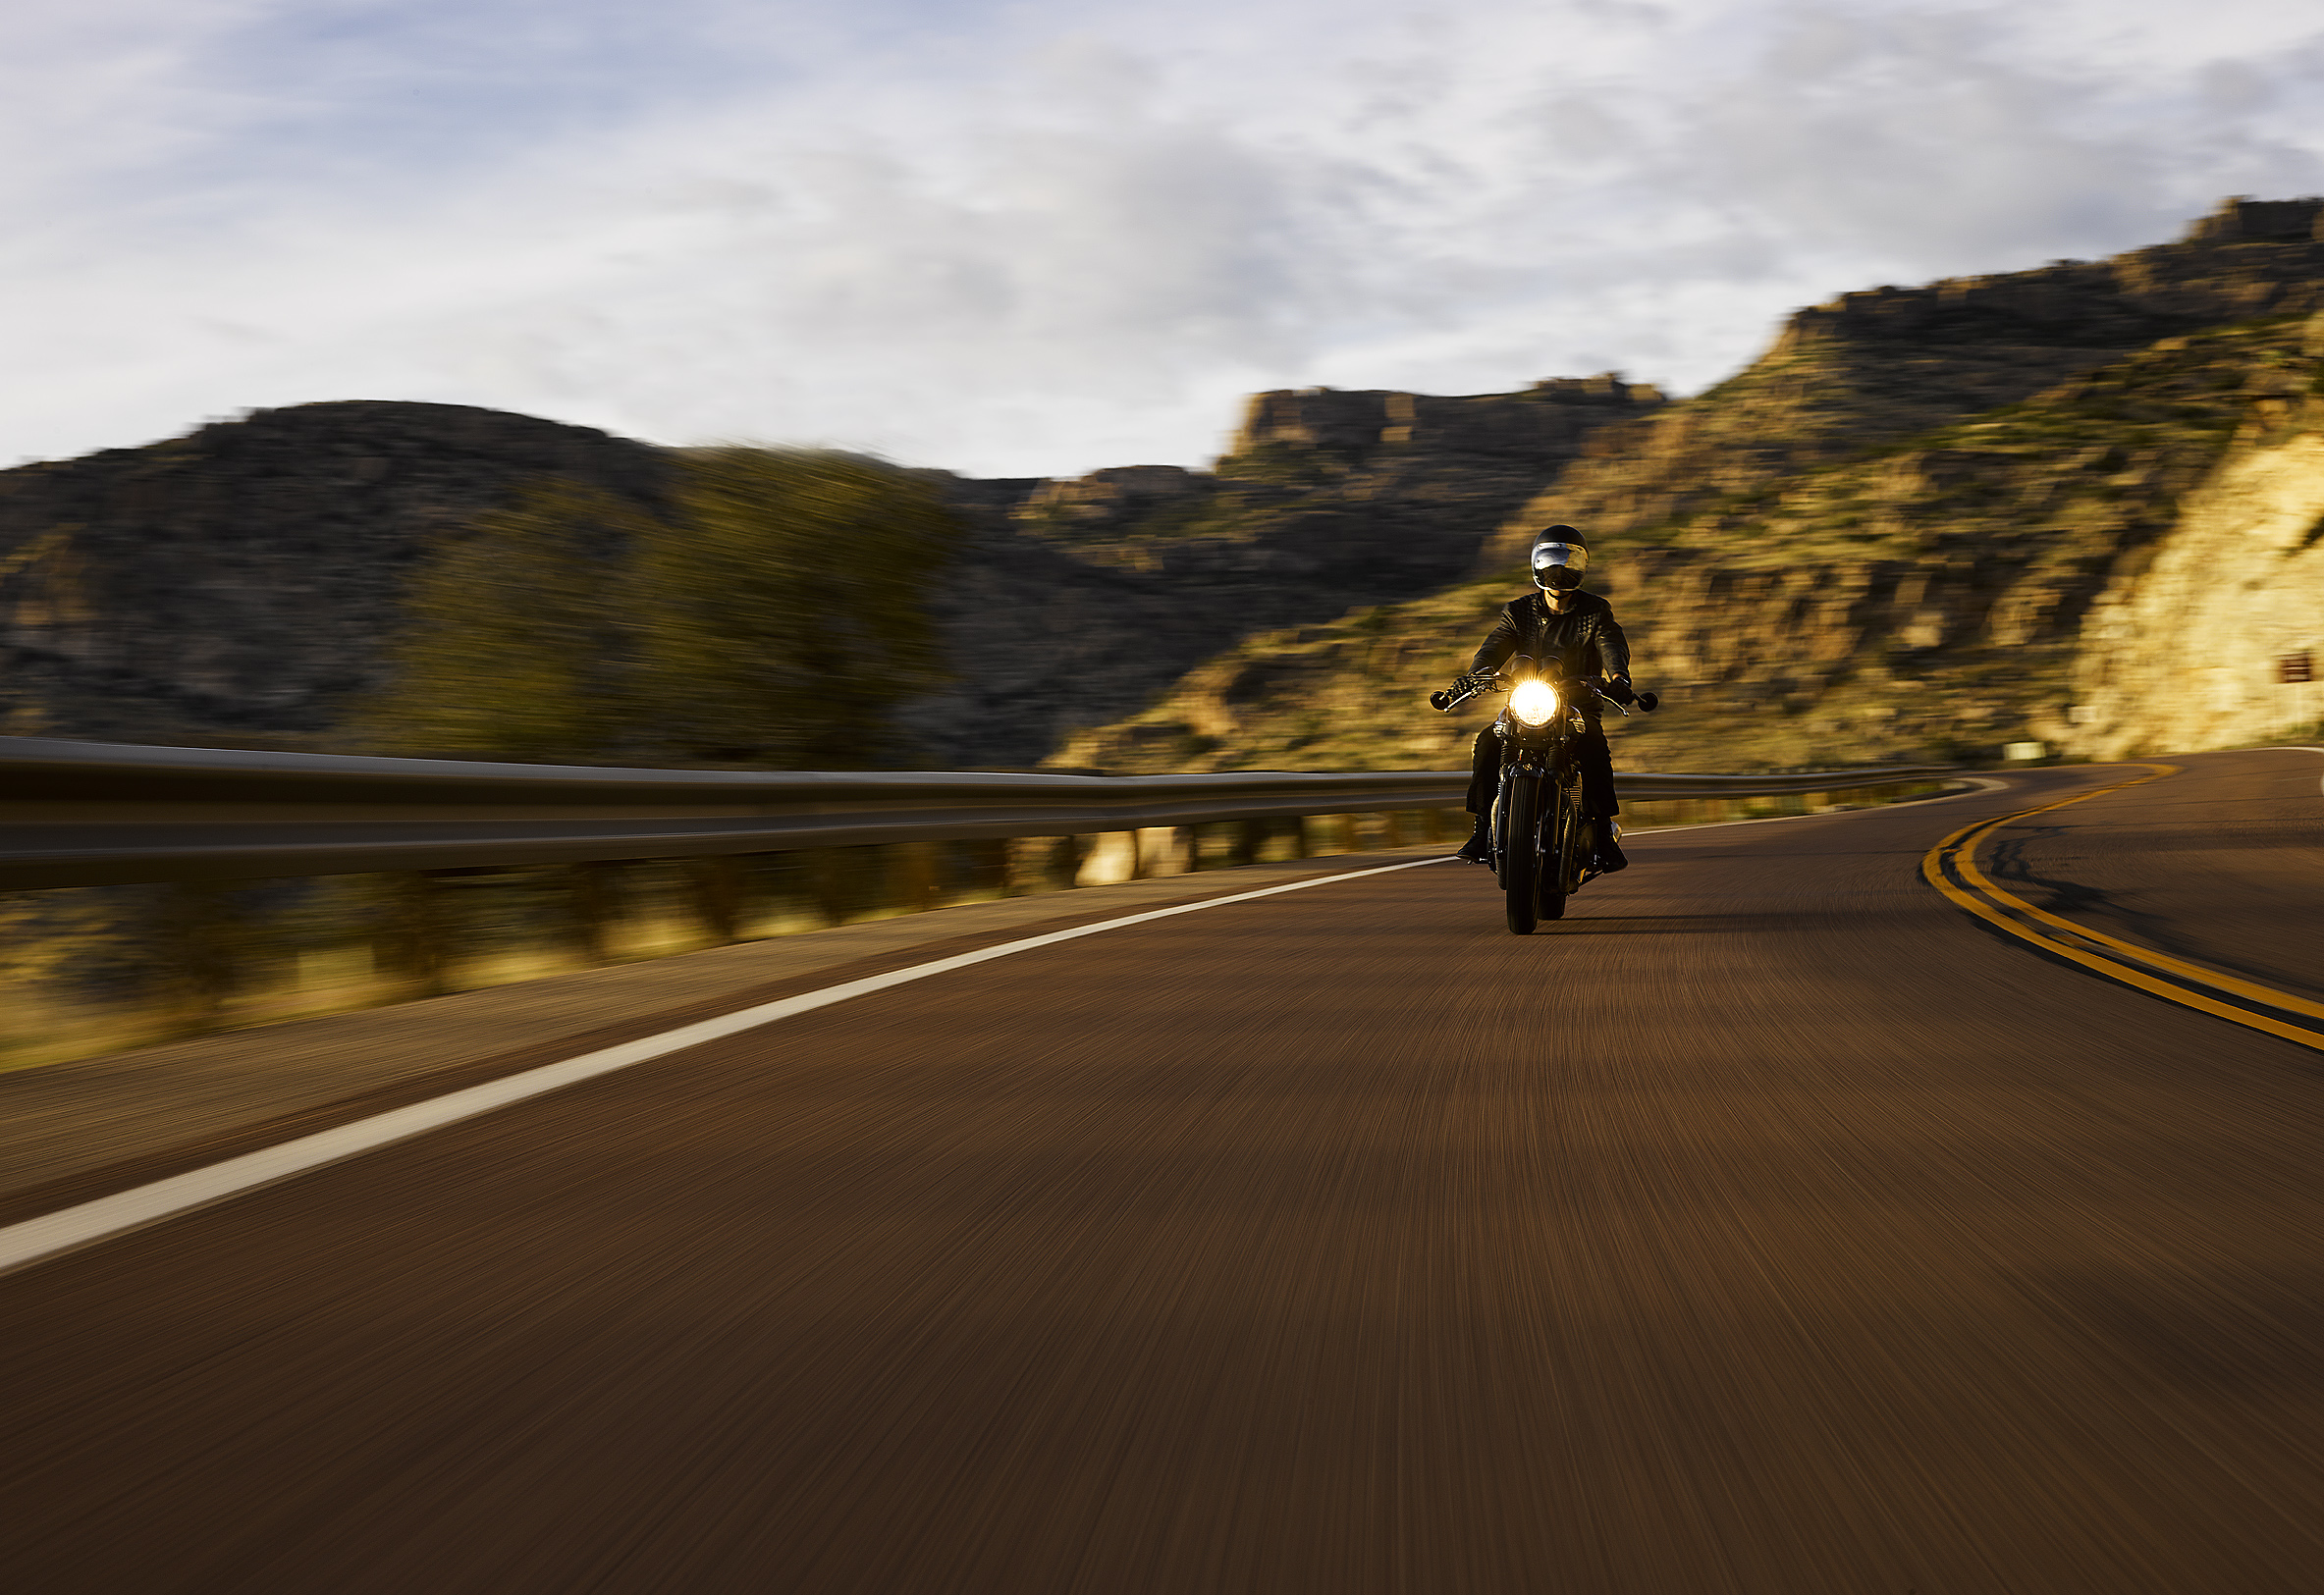
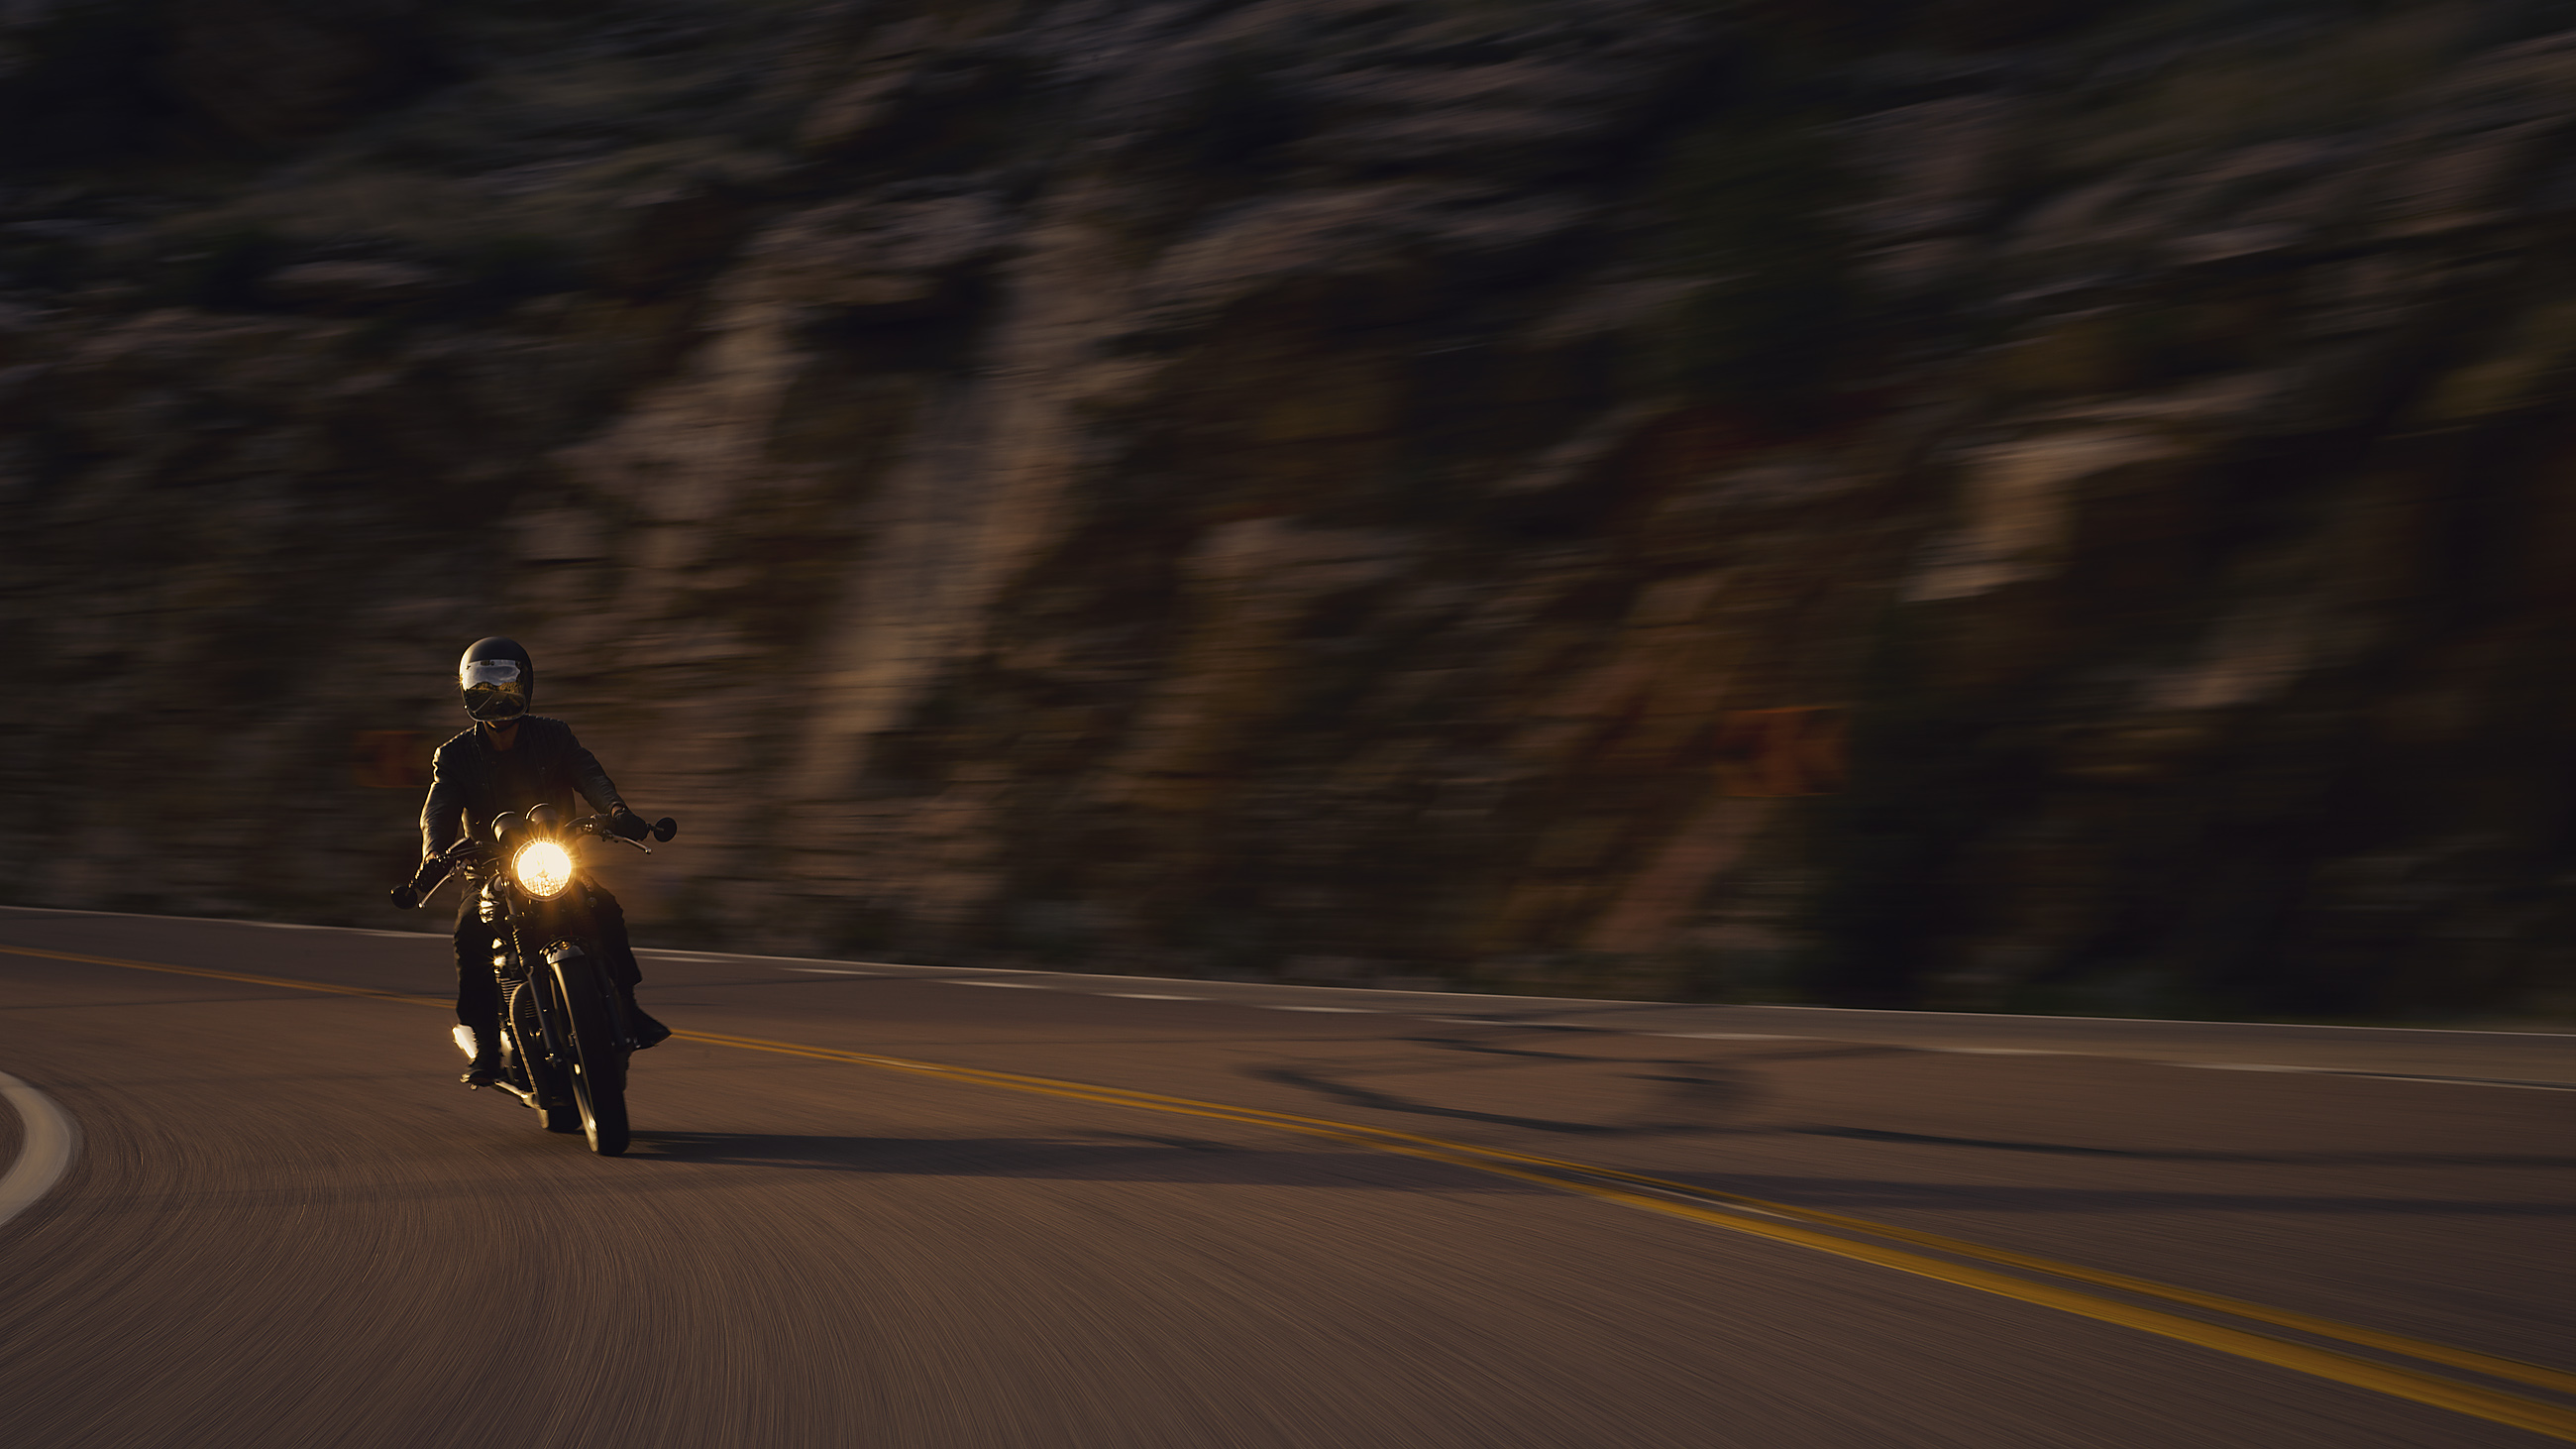
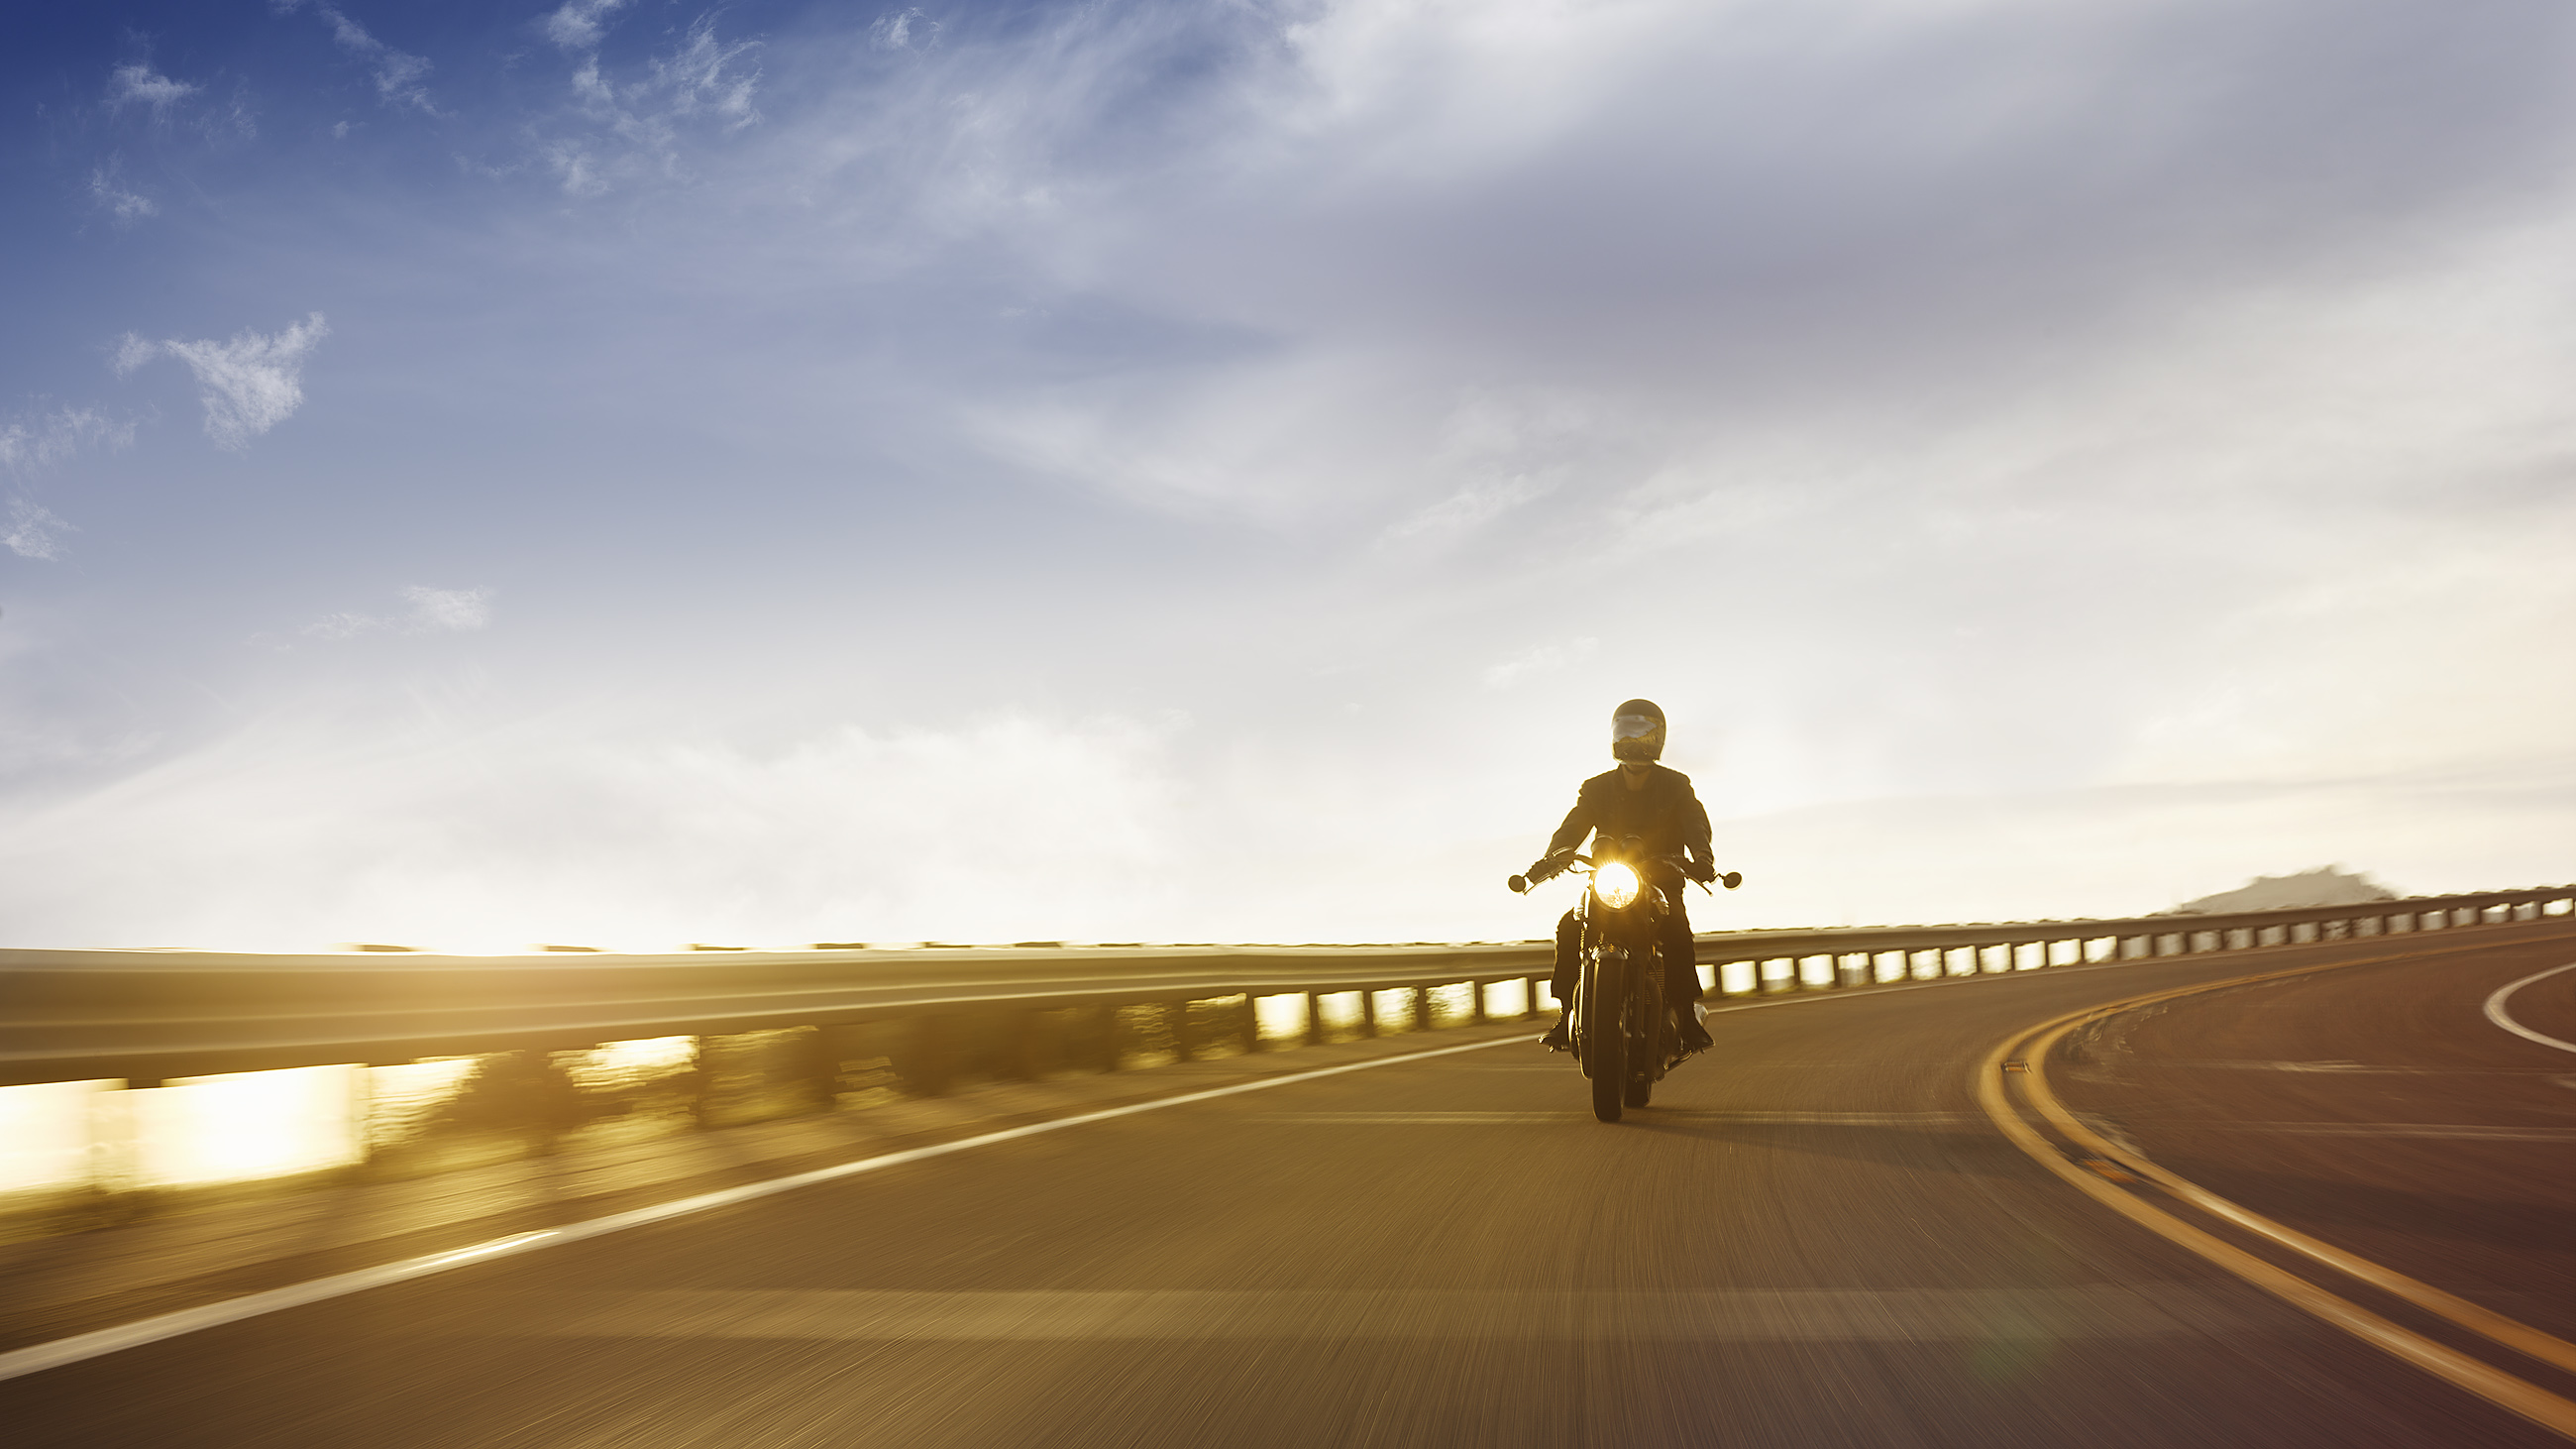
Below are my results… I’m pretty happy with the way these came together and it’s already set my mind buzzing about other uses of the hitch rig. For larger viewing of these images as well as others from the same shoot click here.
The Results: Photographing Motorcycles in Action
More behind the scenes:
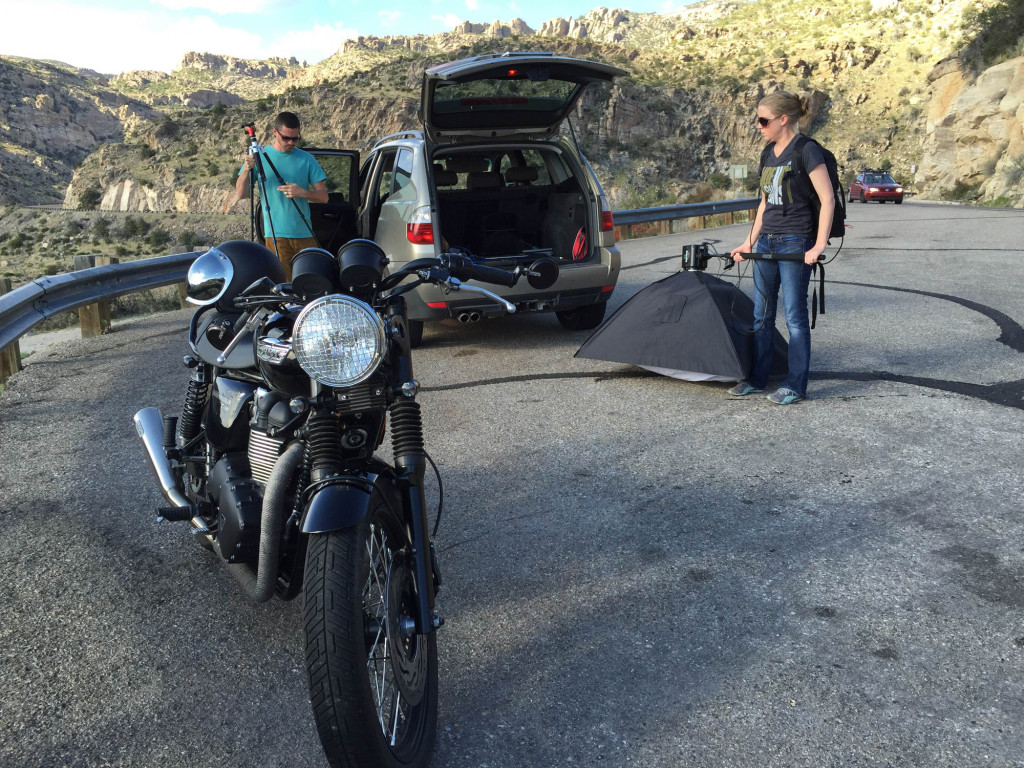
Photo: Dylan Martin @dylmarphoto
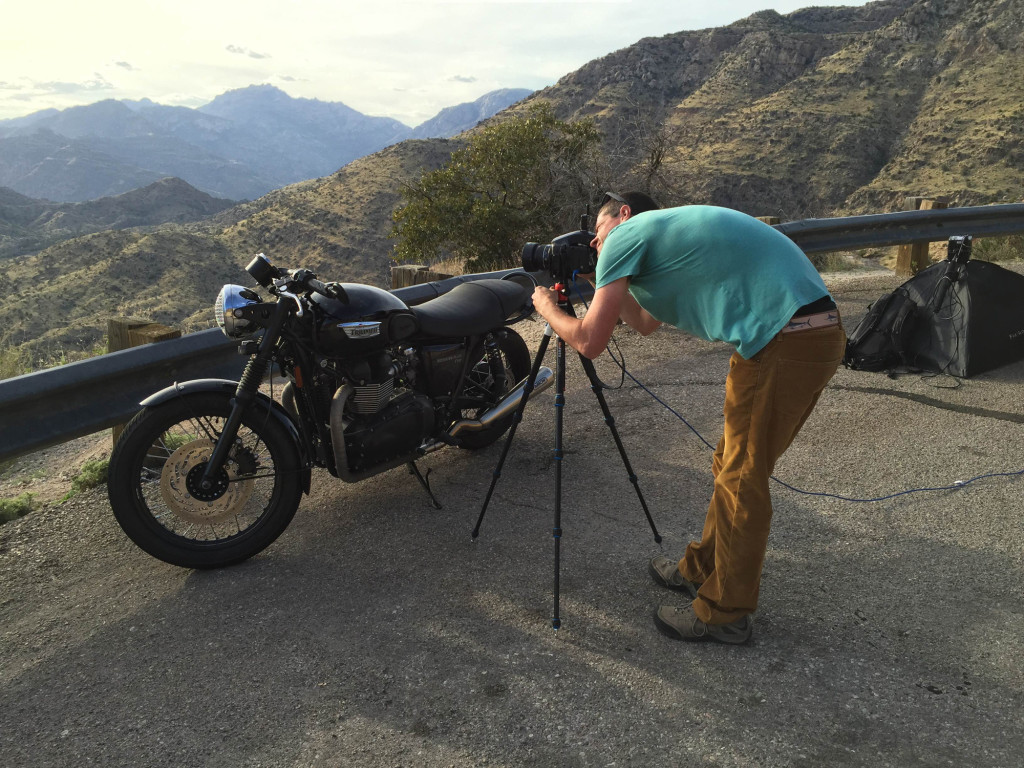
Photo: Dylan Martin @dylmarphoto
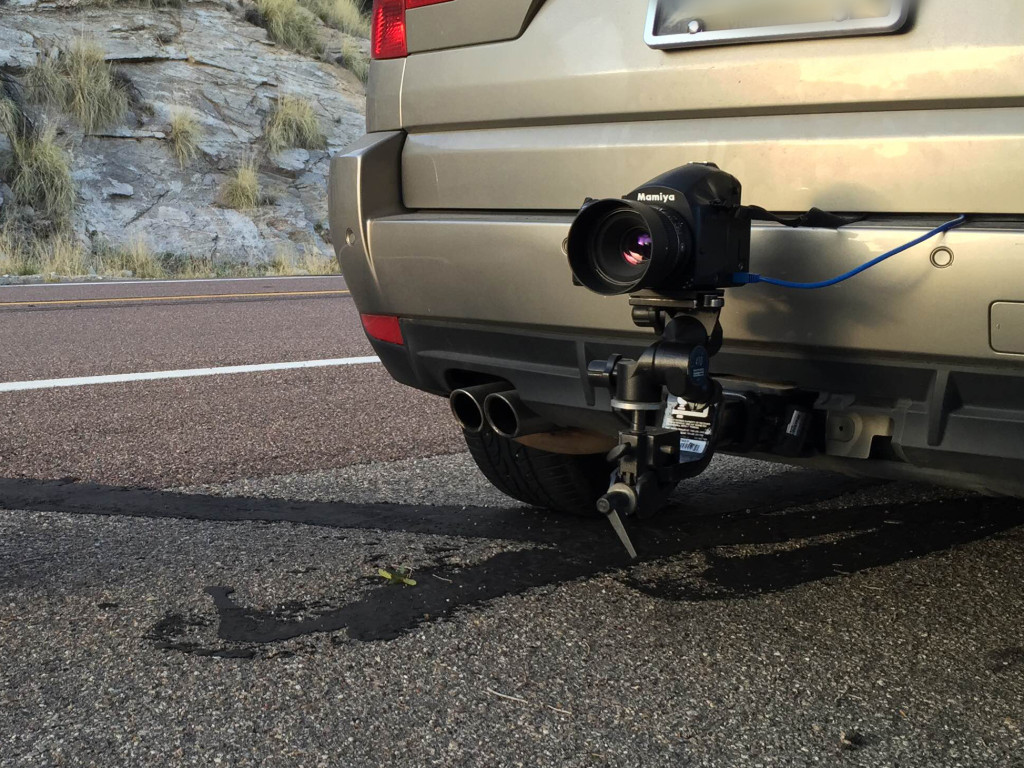
Photo: Dylan Martin @dylmarphoto